Friday, December 17, 2010

Candy. INSIDE. A Cookie.

Becca, here.

Catching up on the 12 days of cookies that have turned into the 20 days. Oh well, just spreading the cookie love a little longer, right?

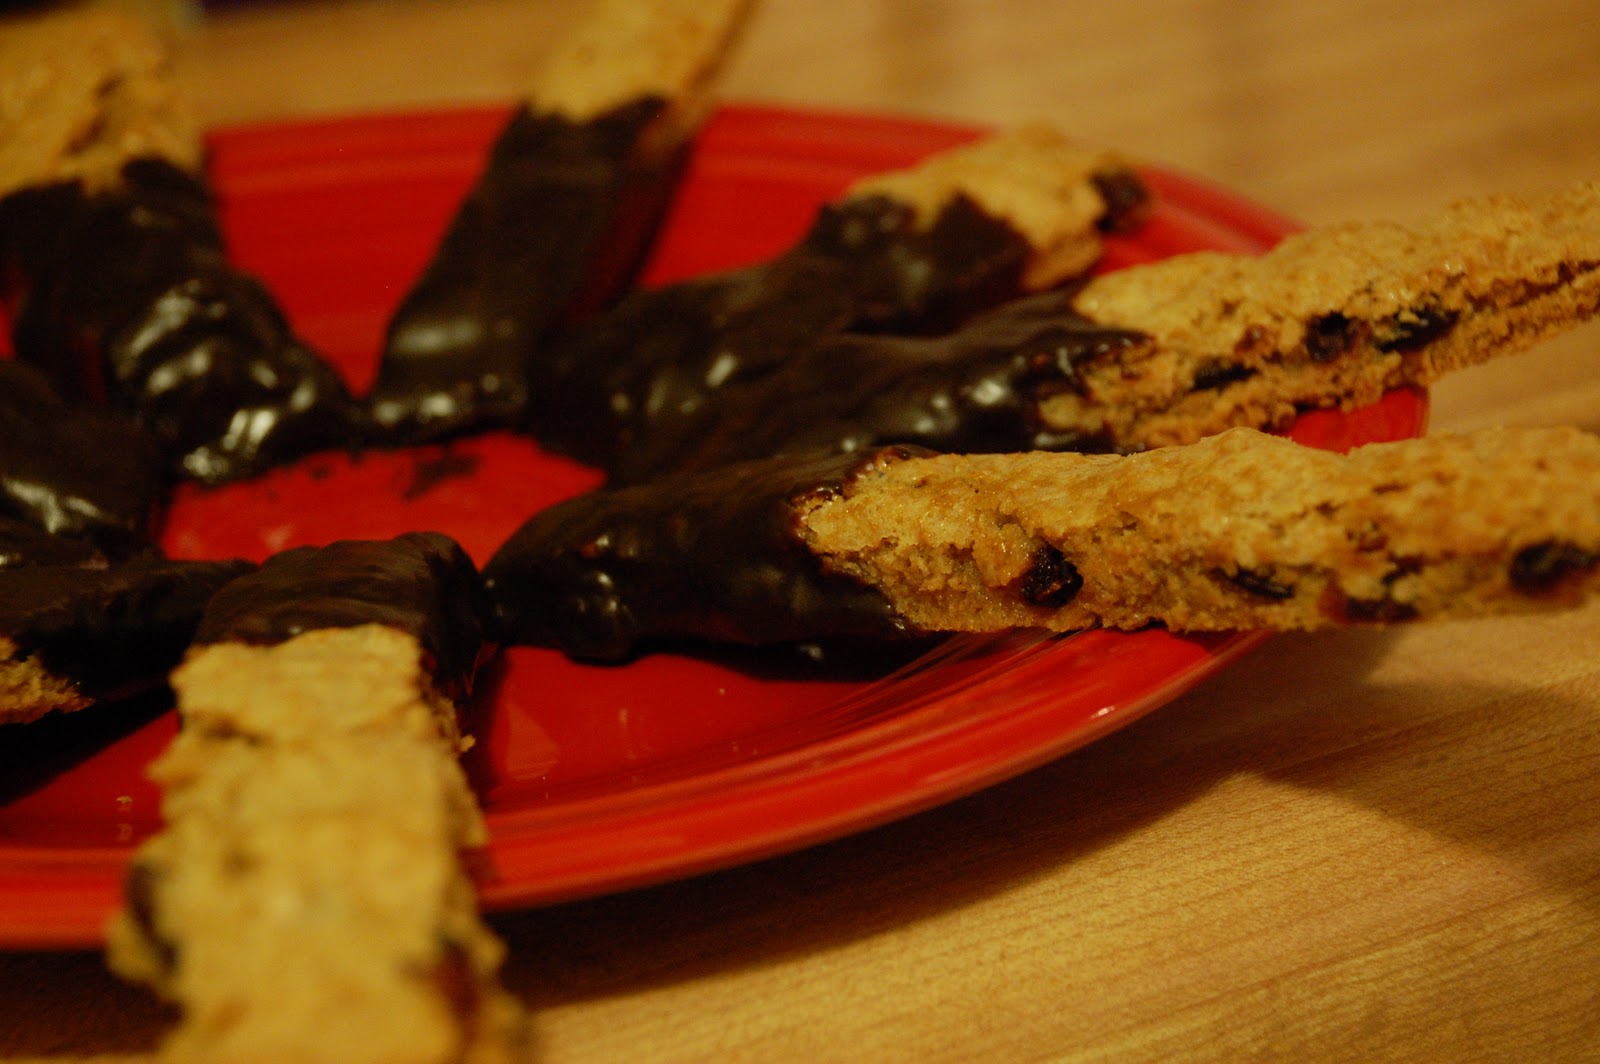
So here we have Day #10.  Alton Brown's Peppermint Pinwheels.  Mine didn't turn out very pinwheel-ish. But they were still edible so all was not lost.


Some adjustments I made:
1. I bought sugar cookie dough.  I had every intention of making them during finals but that didn't happen. Still, it was easier to have pre-made dough this time around.
2. I made the dough and didn't use it for 2 days.  Woops.  When I melted the chocolate and added it to the dough, I didn't realize that it would harden the dough when it was in the fridge.  So I had to wait until I would be around long enough to let it thaw out and then make.
3. I don't have a rolling pin (still...come on Christmas!) and couldn't find a hammer.  So my candy cane pieces were quite large.  If you like candy canes then you'll love these! I did.

Chocolate Peppermint Pinwheels

Gather up:
1 batch Sugar Cookies, recipe follows
3 ounces unsweetened chocolate, melted
1 teaspoon vanilla extract
1 egg yolk (I didn't use this...or the vanilla, since I bought my own dough)
1 teaspoon peppermint extract
1/2 cup crushed candy canes or peppermint candies

Here's what you do:

Divide the dough in half and add chocolate and vanilla to 1 half and incorporate with hands. Add egg yolk, peppermint extract, and crushed candy to other half of dough and incorporate with hands. Cover both with plastic and chill for approximately 5 minutes. Roll out doughs separately to approximately 1/4-inch thickness. Place peppermint dough on top of chocolate and press together around the edges. Using waxed paper or flexible cutting board underneath, roll dough into log. Wrap in waxed paper and refrigerate for 2 hours.

(When I made mine, they were really difficult to make 'pinwheels' so they turned into something swirled like)


Preheat oven to 375 degrees F.

Remove dough from the refrigerator and cut into 1/2-inch slices. Place cookies 1-inch apart on greased baking sheet, parchment, or silicone baking mat and bake for 12 to 13 minutes, rotating the pan halfway through cooking time. Remove from oven and let sit on baking sheet for 2 minutes, then move to a wire rack to cool completely. Store in an airtight container for up to 1 week.

Sugar Cookie:

3 cups all-purpose flour
3/4 teaspoon baking powder
1/4 teaspoon salt
1 cup unsalted butter, softened
1 cup sugar
1 egg, beaten
1 tablespoon milk
Powdered sugar, for rolling out dough
Sift together flour, baking powder, and salt. Set aside. Place butter and sugar in large bowl of electric stand mixer and beat until light in color. Add egg and milk and beat to combine. Put mixer on low speed, gradually add flour, and beat until mixture pulls away from the side of the bowl. Divide the dough in half, wrap in waxed paper, and refrigerate for 2 hours.


I hope you're beginning to like cookies!


Thursday, December 9, 2010

day 9: fruit and nut shortbread

Ally, here.

Like I said before, we're playing a bit of catch up here.

Day 9 of the ultimately awesome cookie baking extravaganza delivered a recipe for fruit and nut shortbread cookies. I will be completely honest with you here and tell you that I had no desire to blog about these cookies. I don't like shortbread. I don't really enjoy dried fruit and chocolate. But, we promised to bake these cookies, so that's what I did. And I'm here to deliver the bad news that they weren't very good. But I'm also here to deliver my ideas for making them delicious.


Melissa d'Arabian's Fruit and Nut Holiday Shortbread

-1 stick butter, at room temperature
-1/3 cup sugar
-1 cup flour
-1/2 teaspoon salt
-1/4 cup chopped pecans
-1/4 cup dried cranberries
-2 tablespoons mini chocolate chips
-2 tablespoons orange marmalade

Now, if you're like me, you probably read that last ingredient and immediately started singing "Lady Marmalade" in your head. You should know that marmalade is basically a jam, not just a Christina Aguilera song. Although I remember jamming out to that song a time or two.

Anyway, back to the directions.

Preheat the oven to 300 degrees. Cream the butter and the sugar in a bowl with an electric mixer.

In a small bowl, mix the flour and salt. Add to the butter and sugar mixture, a little at a time, until just uniform. Gather the dough into a ball and refrigerate for 15 minutes.

Roll the dough out to about a 1/2-inch thickness and cut into squares or rectangles. Place on an ungreased baking sheet and bake 20 minutes.

Meanwhile, combine the pecans, dried cranberries, chocolate chips, and orange marmalade.

Remove the cookies from the oven and top with the marmalade mixture. Bake for 7 or 8 more minutes.


Maybe you are one of those people who genuinely enjoys shortbread cookies and the dried fruit and chocolate combination. If so, more power to you. You should try these.

If you are more like me, forget about the marmalade mixture and try drizzling these with chocolate. And maybe sprinkle some peanuts on top of that. The shortbread cookies themselves weren't bad, but the topping just wasn't for me. Let me know if you try anything different!

You're going to love it!

day 8: a variation on the assignment

Ally, here.

We apologize for the lack of posting. We've been baking, but we've also been studying and writing papers and taking tests. But we will catch up now!

Day 8 of the great Christmas cookie challenge delivered a PB and J Thumbprint cookie recipe to my inbox. Now, I looked at those and thought, "I love peanut butter cookies," because I really do love peanut butter cookies. They are probably in my top five favorite cookies of all time. Unfortunately, when it came to baking time, I wasn't quite in the mood for peanut butter and JELLY cookies. To quote the husband, "If I wanted peanut butter and jelly, I'd make myself a sandwich." So I improvised.

If you'd like to check out the recipe in it's original form, please feel free to get your fill of PB and J. Otherwise, follow me for a slightly altered version.

Be warned, once again, that the dough requires a bit of time in the refrigerator before baking. I always wish someone would tell me that before I get started, so I'm extending that courtesy to you. You're welcome.


-1 stick unsalted butter, at room temperature
-1/2 cup peanut butter
-1/2 cup light brown sugar
-1/2 cup sugar
-1/2 teaspoon vanilla extract
-1 egg
-1/2 teaspoon salt
-1 1/2 cups flour (I used whole wheat, of course, but it made the cookies taste really healthy.)
-sugar in the raw

Beat the butter, peanut butter, brown sugar, and sugar with an electric mixer until creamy. Add the vanilla, egg, and salt, and blend until combined.

Add the flour in half cup intervals.

Scrape down the sides of the bowl so that all of the dough is together. Cover and refrigerate for at least 2 hours. (I cheated a little here and only left mine in the fridge for an hour and a half. I wanted cookies.)

Preheat the oven to 350.

Using a tablespoon, scoop the dough and roll into balls using the palms of your hands. Roll in sugar in the raw and place on a baking sheet. Repeat for the rest of the balls.

Flatten the cookies using the method of your choosing. I just stuck my thumb on top of them to form a little thumbprint, but you can also use a spoon or fork, depending on your preference.

Bake for 10-12 minutes.

Now, I left the jelly off of mine, so I had to add a little something extra. I made a simple powdered sugar frosting that really complemented the peanut butter flavor. Originally, I had planned on drizzling the cookies with chocolate, but after a disastrous chocolate microwaving incident, I gave up and just made the icing.

For the icing, just mix about a cup of powdered sugar with a few tablespoons of water. I always start out with a little powdered sugar and just add more to get to the consistency I desire. Add about a 1/2 teaspoon of vanilla and you're good to go!

I would also like to give the suggestion of using crunchy, rather than creamy, peanut butter. I have always wanted to try that, but I honestly forgot to do it when I made the cookies. If you try it, please let me know how it tastes!

You're going to love it!

Sunday, December 5, 2010

day 7: raspberry cake bars

Ally, here.

We're more than halfway through the 12 days of cookies! Day 7 brings Sandra Lee's raspberry cake bars. I've made something really similar to this before, but I used oats as the topping, I believe. I have to say I preferred the added crunch of the oats, but the husband seemed to be a big fan of the sugar cookie topping.

If you're looking for a quick and simple dessert, this is it. It's virtually impossible to mess up, even if you don't measure anything (which I didn't). With that said, onto the recipe!


Sandra Lee's Raspberry Cake Bars

-1 package (18-oz) refrigerated sugar cookie dough
-3/4 teaspoon lemon extract
-1/2 cup seedless raspberry jam
-1/4 cup chopped pecans

Preheat the oven to 350 degrees.

Sandra Lee suggests lining an 8-inch pan with foil. If you do this, I recommend spraying some cooking spray on the foil, as my dessert stuck a bit to the sides.

Knead together the cookie dough and lemon extract. Press 2/3 of the dough into the bottom of the baking dish.

Spread the jam over the dough. Sprinkle the remainder of the cookie dough over the top of the jam. Scatter the pecans on top.

Bake about 35 minutes, until the edges are brown and the center is cooked through. Let it cool in the pan. Lift the foil to remove the bars.

Like I said, it's pretty simple. You're going to love it. 

I never understood why the term 'Turtle' describes desserts.

Becca, here.

Catching up, here is Day 6.  They are deeeeeelicious. 
Bringing them to a going away party tonight so we roomates + fiance don't have to continue the laborious task of eating cookies. It's a tough job.

Turtle Graham Bars by Claire Robinson

Gather up:
Approximately 14 graham crackers
1 cup (2 sticks) unsalted butter
1 cup packed dark brown sugar
1 cup chopped pecans
Kosher salt, to taste (I forgot this, but oh well!)
12 ounces dark chocolate, finely chopped (I used semi-sweet and it was still delicious)


Begin by:

Preheat the oven to 350 degrees F.
Line a rimmed baking sheet with a silicone mat.
Arrange the graham crackers in a single layer on the lined baking sheet.


  Put the butter, brown sugar, pecans, and a pinch of salt in a saucepan and bring to a boil.
Boil for 2 to 3 minutes, stirring constantly.


Pour the butter mixture evenly over the graham crackers and bake for 15 minutes.
Remove and set aside.


Meanwhile, melt the chocolate in a glass bowl placed over simmering water.
Pour the chocolate over the toffee-covered graham crackers and spread evenly.
Chill completely in the refrigerator for about 30 minutes. Cut into bars.


I added dried cherries to mine as well! Have fun with it!

If I had a lemon for every time it was 70˚ in December

Becca, here.

Living in Baton Rouge you're sure to enjoy a day of summer, in December.  Today was such a day.
These Lemon Ricotta Cookies were perfect for the weather.
And, they were the first (I might add) that I have made as an engaged lady! Hooray!
Fitting too, since my future groom loves all things lemon.

So here you have it, Day 5 (we might be out of order by now..)
Lemon Ricotta Cookies by the lovely Giada De Laurentiis.

Gather up:
2 1/2 cups all-purpose flour
1 teaspoon baking powder
1 teaspoon salt
1 stick unsalted butter, softened
2 cups sugar
2 eggs
1 (15-ounce) container whole milk ricotta cheese (I used 16, which I guess doesn't matter)
3 tablespoons lemon juice
1 lemon, zested

And have enough for a glaze:
1 1/2 cups powdered sugar
3 tablespoons lemon juice
1 lemon, zested

Preheat oven to 375degrees F.

In a medium bowl combine the flour, baking powder, and salt.
Set aside.

In the large bowl combine the butter and the sugar.
Using an electric mixer beat the butter and sugar until light and fluffy, about 3 minutes.
Add the eggs, 1 at a time, beating until incorporated.
Add the ricotta cheese, lemon juice, and lemon zest.
Beat to combine. Stir in the dry ingredients.

Line 2 baking sheets with parchment paper (or aluminum foil works too!)

Spoon the dough (about 2 tablespoons for each cookie) onto the baking sheets.
(I only did about 1/2 a tablespoon because mind spread out so much! Do what you like...)
 
Bake for 15 minutes, until slightly golden at the edges.
Remove from the oven and let the cookies rest on the baking sheet for 20 minutes.

Glaze away:
Combine the powdered sugar, lemon juice, and lemon zest in a small bowl and stir until smooth.
Brush glaze ontop of cookies (as much or as little as you like)
Let the glaze harden for about 2 hours.(or two minutes if you just can't wait)


Enjoy some sunshine on your (sunny/snowy/rainy) December day!


Friday, December 3, 2010

on the fourth day of Christmas, Food Network gave to me, a whole bunch of biscotti

Ally, here.

The fourth day of cookies brings biscotti. Specifically, Food Network requested dried cherry and almond biscotti. Unfortunately, I don't like cherries and I didn't have any almonds on hand. So I improvised with dried cranberries, and left the nuts out, altogether.

The recipe also called for something called turbinado sugar. Apparently it's sugar with much larger crystals. Rather than searching the stores for this, I just used sugar in the raw, which I think is pretty similar and always proves to be delicious.

You can check out the original recipe here. Otherwise, here's my adapted recipe for cranberry biscotti with chocolate ganache.


Here's what you'll need:

biscotti:
-1 stick butter, at room temperature
-1 cup sugar
-2 eggs, plus 1 egg white
-1 teaspoon vanilla extract
-2 cups flour (I used whole wheat, of course)
-1 teaspoon baking powder
-pinch of salt
-1 cup dried cranberries
-2 tablespoons sugar in the raw


chocolate ganache:
-1/2 cup heavy cream
-4 oz semi-sweet chocolate chips

Here's what to do:

biscotti:
1. Preheat the oven to 300 degrees.

2. Use an electric mixer to combine the butter and sugar until fluffy. Beat in the eggs and vanilla.

3. Mix in the flour, baking powder, and salt. Fold in the dried cranberries.

4. Divide the dough in half and roll into two logs. (I found this part of the recipe a little bit confusing. I'm still not sure what kind of logs they are referring to, but I made mine into thick, flattened ovals.) Place on a baking sheet, at least 3 inches apart, as the dough will spread.

5. Mix the egg white with a little water. Brush over the dough and sprinkle with sugar in the raw. Bake for 30 minutes.

6. Remove from the oven and let cool for 10 minutes. Place the cooled biscotti on a cutting board and slice the biscotti apart into 1-inch thick slices. Put these back on the baking sheets and bake for 10-15 minutes more, or until hardened. Cool completely on a rack.

chocolate ganache:
1. Put the whipping cream and chocolate chips in a microwaveable bowl. Microwave for 1 minute, then stir. Continue to microwave in 15 second intervals, stirring in between, until smooth and creamy.

2. Once the biscotti is completely cooled, dip in ganache and place on parchment paper-lined baking sheets. Refrigerate to harden the ganache.


And that's that, folks. This stuff is pretty darn good. I made it to take to a Christmas party tonight, and I'm afraid the husband and I have already taken out a good portion of the batch.

You're going to love it.

Wednesday, December 1, 2010

a coconut Christmas

Ally, here.

Let me begin by saying that today was the perfect day for Christmas baking. It was snowing this morning in Lexington, and there's really nothing better than watching the snow fall while whipping up some cookies (and warming yourself by the oven). I love, love, love snow and I love, love, love baking. That, and the fact that I still had some chocolate gooey butter cookies left from the first day of this adventure, made for a perfect combination.

Now, I'll tell you that I was a little disappointed when the day's cookie assignment arrived in my inbox. Coconut Macaroons. I don't like coconut. Really, the only way I will willingly consume coconut is when it's presented by a girl scout and masked in the chocolate delight of a samoa. But I promised you cookies, so I ventured out to the store (in the snow!) and bought some shredded coconut.

Perhaps you like coconut. If so, this is certainly your recipe. The cookies were a really delightful consistency, and were ridiculously easy to make. But be warned that they look a bit like cheddar biscuits when they come out of the oven.

With all of that out of the way, let's get to baking. The Barefoot Contessa's recipe for coconut macaroons will make you feel like you're on a tropical island, rather than a frozen tundra.


Here's what you'll need:

-14 oz. sweetened shredded coconut
-14 oz. sweetened condensed milk
-1 teaspoon pure vanilla extract
-2 extra-large egg whites, at room temperature
-1/4 teaspoon salt

Here's what to do:

1. Preheat the oven to 325.

2. Combine the coconut, condensed milk, and vanilla in a large bowl.

3. Whip the egg whites and the salt in a bowl with an electric mixer on high speed. They will form medium-firm peaks.

4. Fold the egg whites into the coconut mixture.

5. Line cookie sheets with parchment paper and drop the dough onto the sheets using two spoons or an ice cream scoop.

6. Bake for 25-30 minutes, or until golden brown.


Now, let me tell you a few things about this recipe. You'll look at the bag of coconut shavings and think, wow, this is a lot of coconut. This is true. And you'll look at your two little eggs whites and think, wow, this is not a lot of egg whites. This is not true. Once you start beating the egg whites with your mixer, they will grow into this awesome, (comparatively) enormous white mixture that will seriously amaze you. I've never mixed egg whites like this before and I thought it was pretty darn cool.

The smell of these cookies will fill your kitchen (or your whole apartment, in my case) with joy. You're going to love it (if you like coconut, that is)!

Day Number Two of Cookie Ambitions

Becca, here.

Woke up this morning to find out that I'd be making a Garam Masala-Chocolate Ginger Cookie. 
#1. What is garam masala? Nevermind, I had it. Thank you spice rack from Target 2 Christmas's ago.
#2.  Where does one find molasses? Next to the syrup of course.  (I bought mine for $4)
#3.  How do you peel ginger? With the back of a spoon. Thanks Food Network.

Garam Masala-Chocolate Gingerbread
by Aarti Sequeria

Here's what you'll be needing to scrounge up:

Dry ingredients:
3 cups all purpose flour, plus for dusting
2/3 cup Dutch-processed cocoa powder
1 teaspoon baking soda
3/4 teaspoon fine salt
1 1/2 teaspoons garam masala (Indian spice blend)

12 tablespoons unsalted butter, at room temperature (1 1/2 sticks)
3/4 cup light brown sugar
1 tablespoon freshly grated ginger
1 large egg, lightly beaten
1/2 cup molasses

Combine all the dry ingredients.

Then in another bowl beat the butter with a mixer on medium-high speed until butter is smooth.
Add the sugar and ginger; continue to beat over medium-high speed until light and fluffy.
Scrape down the sides of the bowl and beat in the egg until fully incorporated.
Add the molasses and continue to beat until fully incorporated.
Add the flour in 2 batches and mix on low until combined and forms a sticky dough.
Divide the dough in half, wrap in plastic wrap, and pat into 2 (1/2-inch thick) rectangles.
Chill for at least 2 hours and up to overnight.

Preheat the oven to 350 degrees.
Line 3 to 4 baking sheets with parchment paper/grease
Lightly dust a clean work surface with flour.
Roll each portion of the dough into a 1/4-inch thick rectangle
(still waiting on that rolling pin for Christmas)
My dough was pretty sticky so you'll need to keep cool in fridge between pans.
Bake until the cookies for about 12 minutes.
Transfer to a rack to cool completely.

The recipe said to decorate with a chocolate glaze or royal icing.  Also it suggested rose petals to decorate.  Sorry Aarti, no time for fancy decor when I'm baking between homework.


I went for sugar and peppermint. 
It really made the cookie I think. 
And while i'm not 100% on them quite yet, I'm happy to try it!

If you've got some garam masala laying around, go on and try it.


see this site for more

Monday, November 29, 2010

the 12 days of Christmas cookies

Ally, here.

So we've got some exciting news for you. Becca and I are about to embark on the most exciting 12 day journey of the season! We're taking on Food Network's 12 Days of Cookies. We'll bake them, one day at a time, share our baking troubles and triumphs, and probably gain a significant amount of weight.

I had the honor of kicking off the 12 days of festivities with Chocolate Gooey Butter Cookies. Can you take a wild guess which Food Network star created this recipe? Definitely Paula Deen.

These cookies are incredibly simple and require very few ingredients. And they are surprisingly light and fluffy. But beware that the dough takes a few hours of refrigeration before they are ready to bake.


The 12 Days of Cookies- Day 1- Chocolate Gooey Butter Cookies

Here's what you'll need:

-8 oz cream cheese, at room temperature
-1 stick of butter, at room temperature
-1 egg
-1 teaspoon vanilla extract
-1 box moist chocolate cake mix
-confectioners' sugar

Here's what to do:

1. Preheat the oven to 350.

2. Use an electric mixer to cream the cream cheese and butter together until smooth.

3. Beat in the egg, followed by the vanilla extract.

4. Beat in the cake mix.

5. Cover and refrigerate for 2 hours. This will make it easier to shape the dough.

6. Coat the bottom of a small bowl with confectioners' sugar.

7. Roll the dough into tablespoon sized balls, and coat with sugar. (I just rolled the dough balls around the bowl until they were covered.)

8. Place on an ungreased cookie sheet and bake for 12 minutes.


So here are a few warnings from my experience with these cookies. I'm going to recommend using a spoon to mix in the cake mix, rather than an electric mixer (unless you have a kitchen-aid) because the dough stuck together so much that it completely coated my beaters and rose up to get stuck inside the holes connecting the beaters to the mixers. So that was a bit of a mess that you could probably avoid.

I'll also warn you that the dough is going to be really sticky as you form it into balls. Once you coat it with sugar, it's very manageable, but I had to wash my hands about 10 times during the whole baking process. So be warned.

And my final recommendation is the addition of chocolate chips. I added these to the last batch I put in the oven, and it added an extra burst of deliciousness to the cookie. The husband insists that the cookies were perfect without the chocolate chips, and said he preferred the consistency of the originals, but I like a little extra something in my cookies. So if you're in the mood for chocolate, spring for the chocolate chip addition. It's well worth your while.

Check back soon for more 12 Days of Cookies! You're going to love it!

Wednesday, November 24, 2010

the ultimate cake

Ally, here.

Alright, folks. Before we begin, I must tell you that this is probably the most complicated dessert I have ever made. And it is not something you should try to create on the fly. This cake was time consuming. And it is probably the most unhealthy thing I have ever tasted. But it was so good.

Now that we've gotten that out of the way, let me tell you about this cake. It is all things wonderful. It is chocolate. And coffee. And buttercream frosting. And heath bar. And ganache. And maybe a little bit of heaven.

I was perusing TasteSpotting (a little morning ritual of mine), when I spotted this cake. And even at 7 am, it sounded heavenly. And when I followed the link over to Recipe Rhapsody, I knew I had to make this cake. And I had to make it today. Now, I must say that the recipe author has perfected her cake crafting and decorating, which I certainly have not. So please ignore my amateur cake decorating, and my somewhat lackluster presentation. The cake still tasted great.


Here's what you'll need:

cake:
-1 1/4 cups unsweetened cocoa powder
-2 1/2 cups all purpose flour (I didn't go whole wheat on this one, in hopes of making it as wonderfully unhealthy as possible)
-2 1/2 cups sugar
-2 1/2 teaspoons baking soda
-1 1/4 teaspoons baking powder
-1 1/4 teaspoons salt
-2 eggs, plus 1 egg yolk
-1 1/4 cups warm water
-1 1/4 cups buttermilk
-1/2 cup plus 2 tablespoons canola oil
-1 1/2 teaspoons vanilla extract


mocha buttercream:
-1/4 cup Kahlua
-1 tablespoon instant coffee crystals
-10 oz semisweet chocolate
-6 egg yolks
-3/4 cup sugar
-1/2 cup corn syrup
-4 sticks (1 lb) unsalted butter

ganache:
-4 oz semisweet chocolate
-1/2 cup heavy cream


yummy toppings:
-toffee bits
-Heath bars (if you aren't a toffee fan, replace these with some other crunchy dessert)


Here's what to do:

cake:
1. Preheat oven to 350. Grease two round cake pans.

2. Combine the cocoa, flour, sugar, baking soda, baking powder, and salt in a large bowl. Add the eggs, yolk, warm water, buttermilk, oil, and vanilla. Mix until smooth.

3. Divide the batter between the two cake pans. Bake 32-35 minutes, or until a toothpick inserted into the middle comes out clean. Allow the cakes to cool for about 15 minutes. Then remove them from the pans and cool completely on a wire rack.


buttercream frosting:
1. Microwave the Kahlua until boiling. Remove and add instant coffee, stirring until the coffee is dissolved. Set this aside and let it cool.

2. Microwave the chocolate for 30 seconds and stir. Continue heating in 15-second intervals, stirring inbetween, until chocolate is melted. Set this aside and let it cool.

3. Beat the egg yolks in a medium bowl.

4. Combine sugar and corn syrup in a saucepan and cook over medium heat, constantly stirring the mixture until it comes to a boil. Immediately remove from heat and pour into the egg mixture while the mixer is running. Beat until the mixture is room temperature.

5. Beat the butter in a bowl until fluffy. Then add to the egg mixture, a little at a time, beating until well combined. Once the chocolate and Kahlua mixtures are cool, beat those into the buttercream until smooth.

ganache:
1. Microwave the chocolate and cream in a microwave safe dish for one minute. Stir, and continue heating in 15-30 second intervals until the mixture is smooth. Set aside until it comes to room temperature.

putting it all together:
1. Place one cake layer on a plate and spread buttercream over the top. Place the second cake layer on top and frost the top and sides with the rest of the buttercream.

2. Press toffee bits into the sides of the cake. (This was one of the hardest parts for me. I ended up just throwing the toffee at the cake and hoping it would stick. If you have better luck, let me know.)

3. Break Heath bars into pieces and place on the top of the cake.

4. Pour the cooled ganache onto the top center of the cake and spread so that it pours over the sides.

5. Indulge and enjoy! I found that refrigerating the cake for a bit before serving helped hold everything together and made it taste even more delicious.


And there you have it, folks. The most complicated, but most wonderful cake I've ever had the pleasure of creating. Once again, many thanks to Recipe Rhapsody for providing the recipe and the sugar coma.

If you're feeling ambitious, go ahead and try it yourself! You're going to love it!

Tuesday, November 2, 2010

Sunday Chicken

It might be that I'm becoming more domestic with every blog, but this time I really did feel like my mother.
Oh well, she's the best cook I know so I'm okay with this.

On Saturday Chad and I ventured to the Red Stick Farmer's Market again and found a lady selling "Farm Fresh Chicken"

Couldn't resist. It was about $3/lb and we ended up paying $9 so hooray for chicken for dinner and sandwiches!

Thank the Lord the Farm Fresh Lady had taken all the gross insides out for me.  If she hadn't, I would have had to Google some videos on that. So from taking it out of the wrapper, it was on with the roasting.  I adapted the recipe from our hero, Ina Gaten's 'Perfect Roast Chicken'.  Added a few things since I'm a sucker for extra flavor.

Roast Chicken 

1- 3lb whole chicken
1/2 yellow onion
1/2 head of garlic
1 lemon
3 springs fresh parsley (don't need to chop, just the whole leaves)
1 T dried rosemary
2 bay leaves
1 small can Campbell's Chicken Broth
S&P
olive oil

Stuff the inside of the chicken with half of the lemon. 
Put whole garlic cloves (with skin), some of the onion, rosemary, and parsley inside chicken also.
Rub the outside of chicken with olive oil, S&P
Place other half of lemon, the rest of the onion, garlic, parsley, rosemary, and the 2 bay leaves in the bottom of the pan/crock pot
Put chicken on top of the broth mixture


You can cook it in the oven, but for me the most domestic part of this 
was putting it in the crock pot while at church.
(yes yes, go ahead and laugh at a 21 year old cooking in crock pot on a Sunday afternoon.  I have!) 

Sometimes you might need to tie the legs together with twine, but since my crock pot was small it held it together for me.
Turn the crock pot on Low and cook for 2 1/2 hours

Viola! Roast Chicken.


Saturday, October 23, 2010

good things come in small pie crusts

Becca, here.

Continuing the spirit of fall, I bring you: pumpkin pie!

Sure you've had pumpkin bread, pumpkin bread, pumpkin waffles, pumpkin pancakes, pumpkin muffins, and a plethora of other pumpkin delights.  But here I simply bring you, pumpkin pie.

Against my mother's better judgment I made my own pie crust.  Yes, terrible mistake.
Why make when you can buy one already mixed, rolled, wrapped, and ready?!

I do not know.

You could say I was feeling ambitious.  Or that I didn't feel like dropping the $3 + gas just to get one.

Ergo, "homemade" pumpkin pie.  
(Thank you Libby's for making this process that much simpler.)

I stole the recipe for the crust at allrecipes.com
You can modify the recipe by typing in how many servings you are looking for.  How cool!

Best Ever Pie Crust

1-1/2 cups all-purpose flour
3/4 teaspoon salt
3/4 cup shortening (i used margarine and it works just the same!)
1/4 cup and 2 tablespoons water


Stir flour and salt together.
Cut shortening/butter/margarine into flour until it forms a crumbly mixture.
Add water until the dough forms a ball.
Wrap in plastic wrap and fridge for a few hours.
...My problem here was not having a rolling pin.  Womp, womp.
Roll out the dough and place in pie pan.


Here's where I put the "mini" into pumpkin pie.
With no rolling pin in hand, I molded the dough into large muffin tins for some minis.


Pumpkin Filling

1 large can of Libby's Pumpkin Pie Mix
(Mom always said not to use the premade kind, but here I go again against her wishes)
1 8oz can evaporated milk
2 eggs


Mix together.
If you use the plain pumpkin mix add nutmeg, vanilla, and cinnamon.
Pour into pie pan or muffin tins.
Sprinkle with cinnamon (you know, just for looks)

For my mini pies I baked them for 15 minutes on 425.  Then 40 minutes on 350.
It's all on the can for directions. 


 and you can forget the whip cream...give me ice cream instead!


Let's all give a shout out to the Pilgrims and Indians.
If that's historically correct.


enjoy fall!


enjoy pumpkin __________.

Thursday, October 14, 2010

it's breakfast time.

Ally, here.

Some days, you just need pancakes.

And since it's pumpkin season, you probably need pumpkin pancakes. It's finally getting cold here in Kentucky (and by that, I mean that the temperature has dropped below 70 for the time being), so it's nice to enjoy a warm breakfast drowned in syrup.

I should confess that I love syrup. While I do love pancakes, I think I consume a higher volume of syrup than pancakes for breakfast. But these pumpkin pancakes were so tasty that syrup was simply a side dish, rather than the main event.

I should also confess that I am terrible at making pancakes. Try as I might, I can never get that beautiful round shape. Mine always turn out a bit abstract. So please pardon the pancakes in my photos. They look rough, but they tasted so good!


Here's what you'll need:

-1 cup pancake mix (I used Aunt Jemima's Whole Wheat Blend)
-1 cup milk (I used vanilla soymilk)
-1 tablespoon canola oil
-1 egg
-1 cup canned pumpkin
-1 teaspoon cinnamon
-1/2 teaspoon nutmeg
-1/2 teaspoon allspice

Here's what to do:

1. Combine pancake mix, milk, oil, and egg in a bowl. Mix until well blended.

2. Combine pumpkin, cinnamon, nutmeg, and allspice in another bowl. This will smell wonderful as the pumpkin mixes with the spices.

3. Add the pumpkin mixture to the pancake mix bowl and mix until combined.

4. Cook pancakes on a griddle or skillet. Enjoy with syrup and coffee!


Enjoy another taste of fall! You're going to love it!

Sunday, October 10, 2010

it's the most wonderful time of the year.

Ally, here.

That's right folks. The most wonderful time of the year is upon us. It's pumpkin season. And all of the greatest holidays seem to fall into pumpkin season. Halloween (beloved only for the freedom to increase my chocolate consumption), Thanksgiving (hello, buffet of delight!), and Christmas (and Christmas cookies, and Christmas pies, and Christmas brownies, and Christmas coffee cake...). Like I said, it's the most wonderful time of the year.

I've been craving pumpkin ever since Starbucks brought back the pumpkin spice latte (speaking of which, if anyone knows where I can buy my own pumpkin spice syrup, I will bake you anything you want). So now I've stocked my shelves with pumpkin and I'm ready to dive into fall/winter baking. (I am willing to completely ignore the fact that it is currently 86 degrees in Kentucky.)


So this brings us to today's culinary delight. Pumpkin-cranberry muffins. I've adapted this recipe from a Betty Crocker Fall Baking book that my mom sent me in a fall gift package at some point in my college career. Thanks, Mom!


Here's what you'll need:

-2 cups whole wheat flour
-3/4 cup sugar
-3 teaspoons baking powder
-1 teaspoon ground cinnamon
-1/2 teaspoon ground ginger
-1/4 teaspoon salt
-1 cup canned pumpkin
-1/2 cup canola oil
-2 eggs
-1 cup craisins
-1/2 cup chopped pecans
-sugar in the raw, for sprinkling

Here's what to do:

1. Preheat oven to 400 degrees. Prepare 12 muffin cups with cooking spray or muffins cups.

2. Mix flour, sugar, baking powder, cinnamon, ginger, and salt in a bowl. Stir in pumpkin, canola oil, eggs, craisins, and pecans until well-moistened. Divide batter among muffin cups.

3. Sprinkle with sugar in the raw.

4. Bake 20-25 minutes.


Enjoy a delightful taste of fall! You're going to love it!

Thursday, September 30, 2010

grown up cheese toast

Becca, here.

Did you ever eat cheese toast? Is that a common thing, or just in my house growing up?
My little sister, Emily, lived on cheese toast. 
2 pieces of white bread with a slice of American cheese on each one, popped in the microwave for a few seconds.  It may not sound so appetizing, but it worked for the picky eater.

Recently I made up a little more "grown up" version of cheese toast.   Emily still might not enjoy it, but I thought it was pretty darn good.

Garden Cheese Toast

You'll need:
1 loaf of your favorite savory bread (the Whole Foods Seeduction bread has been a recent favorite)
1 squash
1 zucchini
2 shallots
(Plus S&P, olive oil)
Mozzarella cheese
Crushed red pepper & garlic powder

1.  Slice zucchini and squash into thin disc-pieces.  Slice shallots just the same.
2.  Sprinkle with S&P and drizzle with plenty of olive oil
3.  Roast in oven for 10-15 minutes on 425 degrees (until lightly browned and soft)


4.  Slice bread into thick pieces. This recipe will make 3-4 servings
5.  Cut mozzarella into thin sheets, enough for each piece of toast to be completely covered
6.  When veggies are done, share their love across the toast pieces.
Sprinkle with crushed red pepper & garlic powder


 7.  Then, pile on the cheese!
8.  Broil on low for about 5 minutes, or until cheese is golden brown.

   You can be like Chad and get artsy with it, or just chomp it down. 
Either one gets your dose of veggies in!

Wednesday, September 29, 2010

and the apple strikes again.

Ally, here.

I returned to the apples this week after my mother-in-law sent me a link to Southern Living's favorite apple recipes. After drooling over all of them, I decided on the caramel-apple muffins. And what a great decision that was!

We've been suffering from a bit of a drought here in Lexington, but the heavens finally opened at the beginning of this week and the rains came down. So the husband and I awoke on Monday morning to the beautiful sound of rain falling on the trees and a wonderful temperature far below 90 degrees. A cool, relaxing morning such as this deserved a warm, slow breakfast. So I got to baking.

And let me tell you, these muffins were good. And warm. And gooey. And I consider them a health food (an apple a day keeps the doctor away).

I adapted the recipe to meet my needs (and to keep the husband and myself from consuming 24 muffins in two days).


Here's what you'll need:

for the muffins:
-1 cup sugar
-1/2 cup canola oil
-2 eggs
-1 tsp vanilla extract
-1 1/2 cups whole wheat flour
-1 1/2 tsp ground cinnamon
-1/2 tsp baking soda
-shake of salt
-1 1/2 cups finely chopped apple (about 1 large apple)
-1 cup pecan pieces (you can add more or less pecans as your taste buds permit)

for the frosting:
-1 14-oz can sweetened condensed milk
-1/4 cup light brown sugar
-1/4 cup butter
-1/2 tsp vanilla extract

Here's what to do:

the muffins:
1. Preheat oven to 350 degrees. Spray a 12-cup muffin pan.

2. Peel and finely chop apple(s).

3. In a large bowl, stir sugar, canola oil, eggs, and vanilla.

4. In another bowl, combine flour, cinnamon, baking soda, and salt. Once combined, add this to sugar mixture and stir.

5. Fold in finely chopped apples and pecans.

6. Divide into muffin cups and bake for 20 minutes.


the frosting:
1. Put all frosting ingredients in a saucepan over medium heat. Bring to a boil, stirring constantly, until the frosting reaches a pudding-like consistency.

2. Remove from heat.

3. Poke a hole (about the width of your finger) in the top and the muffin drizzle the frosting over muffins. The hole will catch more frosting and add some extra excitement to every bite! Sprinkle with pecan pieces.

I used a super cute mini-bundt cake pan to make my muffins extra fun. Feel free to do the same! You're going to love it!

Thursday, September 23, 2010

handfuls of fall

Becca, here.

About two years ago, Meagan introduced me to something surprising.

I am not a fan of candy corn. 
I hear it's one of those "you hate it or you love it" candies. 
And I hate it.

But like other things in the culinary world, sometimes when you add just the right thing,
it turns into something spectacular. Like...


Candy Corn & Peanuts. 


it's like a little handful of fall in every bite.


All you need is 1 bag of candy corn, and 1 jar of roasted, salted peanuts.  
Mix them together, and make sure that you get a little bit of both in every bite.  
(Does the "bite of both" sound familiar? See that delicious pork chop post)


Meagan once said it tastes like eating a Payday.  Now, I've actually never had one, but I think I'll stick with this addicting munch. Trust me, you can't keep your fingers out of the jar.

What's your favorite fall eat?